
The contractor arrived on a Tuesday morning with a garden sprayer, a gallon of diluted bleach, and the confident energy of a man who’d done this a thousand times. He walked through the basement, sprayed the dark colonies growing across the drywall behind the water heater, watched the color drain from the surface within minutes, and told the homeowner it was taken care of. Invoice: $380. Gone by noon.
By October — six weeks later — the mold was back. Darker this time, and spreading further. The homeowner called a different company. That contractor looked at the original job and shook his head slowly, the way contractors do when they’re about to deliver news that makes them money. “Previous guy just bleached it,” he said. “That never works on drywall. What you need is encapsulation. We paint it with antimicrobial primer, seals it right in.” Invoice: $2,200. Gone by Friday.
The mold grew through the primer by January.
This is not an unusual story. It’s the default story in the mold remediation industry — two interventions sold with confidence, both scientifically wrong, both profitable, both leaving the problem exactly where it started except now the homeowner is down $2,580 and the colony has had three more months to establish itself in the wall cavity. Whoever lives in that house has been breathing mycotoxins the entire time. If they happen to carry the HLA-DR gene variants that prevent normal biotoxin clearance — which roughly 24% of people do — those three months represent a period of ongoing neurological and inflammatory damage that will take far longer than three months to undo.
This article is about what actually kills mold, why bleach and encapsulation fail at a biological level, what the peer-reviewed evidence says about effective remediation, and the complete protocol that works when the health stakes are real. Already done the bleach treatment and watched the mold come back? About to hire a remediator and want to know what to demand? Start here.
The Body: What Mold Actually Is and How It Lives Inside Your Walls
- Physical penetration barrier: Hyphae grow into microscopic pores and fiber channels that bleach solution cannot access. Surface application of bleach does not create the contact time or penetration depth required to reach them.
- Biofilm formation: Many mold species produce extracellular polysaccharide matrices — biofilms — that coat the colony and provide a physical barrier against chemical agents. Bleach struggles to penetrate mature biofilms at household concentrations.
- Spore dormancy: Spores embedded in building materials in dormant form are extraordinarily resistant to chemical disinfectants. Where vegetative hyphae might be damaged by bleach contact, dormant spores survive and re-germinate when conditions allow.
- Defensive sporulation: Many mold species respond to chemical irritants by sporulating more aggressively. Applying bleach can trigger a defensive spore-release event that seeds new colonies throughout the building before the surface growth is destroyed.
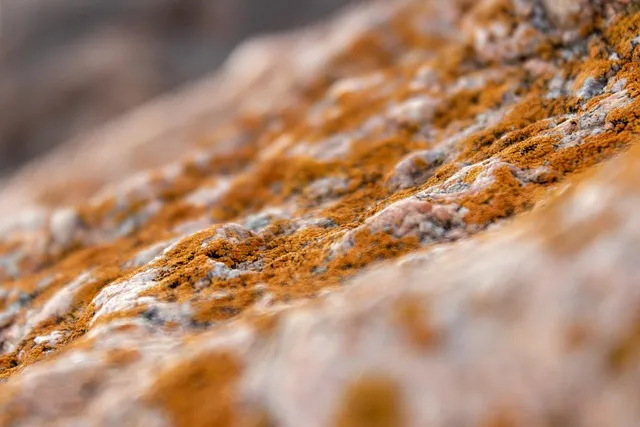
Mold is not a bacterium. It’s a fungus — a eukaryotic organism with dramatically different cellular architecture than bacteria. This matters because the chemistry that kills bacteria doesn’t reliably kill fungi. Bleach is highly effective against bacteria, disrupting the comparatively simple cellular structures of prokaryotic organisms. Against the multi-layered cellular walls of fungi, bleach has a much narrower window of effectiveness — a window that closes completely once porous building materials enter the picture.
What’s visible as a dark bloom on a bathroom wall or basement drywall is the fruiting body of the mold colony. The reproductive tip of the organism, the part releasing spores. The living mass sits below it, embedded in the material. Mold grows by extending hyphae — thin, thread-like filaments — into the substrate. In drywall, wood, ceiling tiles, and most other building materials, those hyphae penetrate millimeters to centimeters deep into the pores and fiber channels. The hyphae secrete enzymes that break down the substrate’s organic compounds, converting cellulose into nutrients the mold absorbs. That enzymatic digestion is what causes the characteristic staining and structural softening in mold-colonized wood — the fibers are being consumed from the inside.
The lifecycle inside a wall cavity looks like this. A dormant spore — extraordinarily durable, chemically resistant — lands where moisture is present and an organic carbon source is available. It germinates, extends hyphae into the material, and begins digesting. As the colony matures, it produces the visible surface bloom and releases new spores into the building’s air. The spores of common indoor mold species, particularly Stachybotrys chartarum, Aspergillus, and Chaetomium, carry mycotoxins on their surfaces. Every disturbance of the colony — including spraying it with bleach — aerosolizes spores and releases mycotoxins into the breathing zone. Which is why improperly disturbed colonies cause acute health events in sensitive individuals.
The hyphae embedded in porous materials are protected by mechanisms bleach cannot overcome at real-world application concentrations:
Here’s the chemistry specific to why bleach fails: sodium hypochlorite has a high ionic charge. Apply it to a porous surface, and the water carrier gets absorbed into the material while the hypochlorite ions are repelled at the surface by the ionic characteristics of building substrates. The disinfecting compound stays at the surface. The mold, rooted below, is unaffected. What bleach does do, reliably, is destroy the melanin and chromophores that make the mold visible. The colony bleaches to white or colorless. The stain is gone. The organism is not.
There’s a secondary mechanism that accelerates failure. Bleach solution runs approximately 95% water. Apply it to materials already moist enough to support mold growth, and more water gets added to a moisture problem. Mold requires water activity above roughly 0.70 to grow. A water-heavy solution applied to porous materials elevates local moisture and speeds regrowth from the surviving hyphae. The treatment actively improves the conditions for the colony it failed to kill.
This biology also explains why the health effects of mold exposure persist even when a building “looks clean” after bleach treatment. The mycotoxin-producing machinery of the colony — the metabolically active hyphae embedded deep in the material — was never addressed. The eight mycotoxins responsible for the most serious human health damage, including trichothecenes, aflatoxins, and ochratoxin A, are produced in those embedded portions. Surface decolorization does not reduce mycotoxin load. The organism stays intact, metabolically active, and keeps producing the compounds making people sick.
The Science: What the Evidence Actually Shows About Bleach and Mold
Whether bleach kills mold doesn’t have to stay in the realm of chemistry theory. Research groups have tested it directly, and the findings are consistent.
Surface Efficacy vs. Substrate Penetration — The Core Finding
Research examining bleach efficacy against common indoor mold species, including work building on Rutala and Weber’s extensive disinfectant research at the University of North Carolina, finds the same pattern on repeat: on non-porous surfaces, sodium hypochlorite at 500–1,000 ppm achieves meaningful kill rates when applied with adequate contact time of ten minutes or more. On porous surfaces including drywall and wood, the same concentrations fail to penetrate sufficiently to kill subsurface hyphae. Surface disinfection — where the organism is killed at the surface only — consistently results in regrowth from surviving hyphae within one to four weeks in the absence of moisture correction. The penetration barrier isn’t a marginal effect. It’s the entire story on porous materials.
EPA and NIOSH Remediation Framework
The EPA’s Mold Remediation in Schools and Commercial Buildings guide — which has informed residential guidance since its publication — explicitly states that “the use of a biocide such as chlorine bleach is not recommended as a routine practice during mold remediation.” Not precautionary hedging. It reflects outcome data from the body of work examining remediator outcomes in water-damaged buildings. The data consistently shows bleach-based approaches to mold remediation in residential settings produce higher recurrence rates than physical removal approaches. The EPA’s own guidance aligns with NIOSH findings on the same question.
Zhang and Hu, 2016 — Mycotoxin Persistence After Surface Treatment
This study examined ochratoxin A and aflatoxin persistence in building materials after various decontamination approaches. Surface treatment with bleach at standard residential dilutions — 1:10 concentration — reduced surface mycotoxin levels by approximately 30–40%. Physical removal of contaminated materials reduced mycotoxin load by over 90%. The study concluded surface treatment was inadequate for mycotoxin remediation in the context of human health protection. This is the metric bleach advocates never address: even if bleach could kill mold cells in porous materials (it can’t), the mycotoxins those cells already produced aren’t destroyed by bleach. Mycotoxins are heat-stable, chemically persistent compounds. They remain embedded in building materials long after the organisms that produced them are gone, and they keep causing health damage to occupants. Physical removal of the material is the only intervention that removes them.
Mendell et al., 2011 — Environmental Health Perspectives
This systematic review examined 22 studies on the relationship between dampness indicators, mold, and respiratory health outcomes. The review found consistent associations between visible mold and increased risk of asthma exacerbation, respiratory symptoms, and airway inflammation across mold species. Critically for remediation, interventions addressing underlying moisture conditions showed measurable health benefit. Surface treatments alone did not produce measurable reductions in health outcomes. The implication for bleach treatment is direct: apply bleach to the surface and leave the moisture source intact, and the health outcomes of the building’s occupants do not improve.
What gets created is the visual impression of a solved problem without any change to the biology.
Shoemaker and House, 2006 — Neurotoxicology and Teratology
Ritchie Shoemaker’s foundational research on biotoxin illness established that individuals with certain HLA-DR gene variants cannot clear mycotoxins through normal immune pathways. What this research adds to the remediation picture is the stakes. For the approximately 24% of the population with these variants, ongoing mycotoxin exposure from incompletely remediated buildings produces a progressive inflammatory cascade that can cause permanent neurological damage. “Good enough” remediation — bleach treatment, encapsulation, surface cleaning — is not good enough for a significant fraction of building occupants. These individuals require environments with mycotoxin loads near zero, achievable only through physical removal of contaminated materials and proper structural drying.
The convergence across this research is unambiguous: bleach does not kill mold in porous building materials, does not meaningfully reduce mycotoxin load, and does not produce health improvement in exposed individuals. Trying to interpret personal exposure through objective measurement? The mycotoxin urine test gives a direct measure of current body burden — independent of whether a contractor has made the building look clean.
The Protocol: What Actually Works — The Remove, Dry, Verify Framework
-
Identify and fix the moisture source first. The absolute prerequisite. No work on the mold itself matters if the water source is still active. Mold requires water. Remove the water permanently and mold cannot sustain itself. Leave the water and mold will recolonize any treated surface within weeks regardless of what was used to treat it. Common moisture sources driving residential mold include roof penetrations, failed window flashing, plumbing leaks inside walls (including slow drips that accumulate over months), HVAC condensation drain failures, foundation water intrusion, inadequate crawl space vapor barriers, and chronic high indoor humidity from poor ventilation. Identifying the specific source requires visual inspection, moisture meter readings in walls and floors, and sometimes infrared thermography to locate hidden wet zones. This diagnostic work is part of legitimate remediation scope — not a separate optional service.
-
Establish containment before touching anything. Before any mold-contaminated material is disturbed, isolate the work area using polyethylene sheeting — minimum 6 mil — sealed at all seams and entry points. Establish negative air pressure using an air scrubber with true HEPA filtration (99.97% efficiency at 0.3 microns), vented to the exterior. This negative pressure prevents cross-contamination to unaffected building areas during demolition and removal. Everyone working inside containment wears a P100 respirator minimum, full-body disposable coveralls, gloves, and eye protection. A contractor who arrives without setting up containment before touching mold-contaminated materials is not doing professional remediation.
-
Physically remove all colonized porous materials. This is the step no chemical can replace. Mold-contaminated drywall, insulation, ceiling tiles, saturated wood, and carpet must be physically removed from the building. The IICRC S520 standard — the professional remediation standard — specifies that drywall with mold penetration requires removal, that visually contaminated insulation requires removal, and that wood with surface mold penetrating the grain requires treatment or removal based on depth. Removal is done wet where possible — wetting materials before cutting reduces spore aerosolization. Cut materials are double-bagged in sealed polyethylene, labeled, and disposed of according to local regulations. For wood structural framing with surface mold but no deep grain penetration, aggressive antimicrobial treatment may be sufficient. For wood with visible staining deep into the grain, replacement is the reliable answer.
-
HEPA vacuum all remaining surfaces. After contaminated materials are removed, HEPA vacuum every remaining structural surface — framing, subfloor, concrete, pipes. A standard shop vacuum will redistribute spores throughout the building. True HEPA vacuums with sealed filtration capture particles down to 0.3 microns, within the size range of most mold spores. HEPA vacuuming is not optional and it is not the same as sweeping.
-
Apply antimicrobial treatment to structural elements. After physical removal and HEPA vacuuming, antimicrobial treatment of remaining structural surfaces is effective — because accessible surfaces are now being treated, where penetration is achievable. Hydrogen peroxide-based products at 3–10% concentrations are preferable to bleach: hydrogen peroxide is a smaller molecule with lower ionic charge than hypochlorite and penetrates semi-porous surfaces more effectively. Products containing quaternary ammonium compounds (quats) or specifically formulated botanical agents have also demonstrated efficacy on wood framing. Apply with adequate contact time (10–30 minutes) and allow complete drying before proceeding. These treatments supplement physical removal — they do not replace it for heavily colonized materials.
Phase 1: Remove — Find the Water, Then Take Out the Material
Phase 2: Dry — Get the Structure Below Regrowth Thresholds
After treatment, the structure must be dried to baseline moisture levels before reconstruction begins. This requires commercial-grade dehumidification equipment — not household dehumidifiers, which lack the capacity for structural drying. Wood framing should reach below 19% moisture content measured with a pin-type moisture meter before enclosure. Concrete and masonry should test below 4% with a concrete moisture meter. Drying a significant water-damage scenario typically requires 3–7 days of continuous commercial dehumidification. Skip this step and rebuild on a wet structure, and the next colony gets set up right behind the new drywall.
This is also when air purification becomes a relevant supporting tool. HEPA air purifiers with activated carbon filtration reduce airborne spore counts and gaseous mycotoxin levels in occupied spaces during and after remediation. They cannot remediate a building on their own, but they’re appropriate as part of ongoing air quality management.
Phase 3: Verify — Independent Clearance Testing
Clearance testing — air and surface sampling performed after remediation and before reconstruction — must be conducted by an industrial hygienist (IH) who is independent of the remediation contractor. The IH collects samples, sends them to an accredited mycological laboratory, and interprets results against pre-remediation baseline samples and outdoor control samples. A clearance letter from the remediator’s own inspector is worth nothing. Independent clearance from an IH is the only meaningful sign-off.
For post-remediation clearance, the ERMI (Environmental Relative Moldiness Index) tests for DNA from mold organisms, providing a more reliable measure of whether the environment has been adequately cleaned than visual inspection alone. Any contractor who refuses independent clearance testing or tries to use their own inspector is protecting themselves from accountability. Use the independent IH. Always.
If the building has produced significant ongoing exposure, the mold recovery roadmap for the body’s healing process begins only after the building environment is verified clean. Building remediation and personal recovery are sequential, not simultaneous. Meaningful detox from mold exposure isn’t possible while still breathing mycotoxins in an incompletely remediated space.
The Proof: The Encapsulation Scam and How to Spot It
- No containment setup: Legitimate remediation begins with negative air pressure containment before any mold-contaminated material is disturbed. A contractor who starts spraying anything without first setting up containment is not doing real remediation.
- No material removal in the scope: If the proposal does not include removal and proper disposal of contaminated drywall, insulation, and flooring, something is wrong. These materials cannot be remediated in place.
- Implausibly fast timelines: Proper remediation of a significant mold problem takes days. A quote promising a 500-square-foot basement job done in a single afternoon is a quote for encapsulation, not remediation.
- No moisture source inquiry: A contractor who does not ask to see the plumbing, roof condition, HVAC drainage, or foundation walls is not doing remediation. Every mold colony has a water source. Finding it is part of the work.
- Encapsulant as primary product: If an encapsulant or “sealer” appears as the primary treatment in the proposal rather than as a finishing step after removal, ask pointed questions. The answer will tell you everything.
The bleach myth costs individuals money and health at the DIY level. The encapsulation scam costs far more — because it arrives wrapped in professional credentials, official-looking reports, and the implied authority of a licensed contractor who charges accordingly.
Encapsulation as practiced in the residential remediation industry works like this: a contractor applies a coating — antimicrobial primer, sealant paint, or proprietary encapsulant product — over mold-contaminated building materials without physically removing them. The coating is supposed to “trap” the mold, seal off the mycotoxins, and prevent further spread. The job looks complete. The wall is white and smooth. The inspector can write a clearance letter. The homeowner writes a check. The mold is still there, every molecule of it, metabolically active behind the coating.
Encapsulation has a legitimate, narrow use case: it’s an appropriate final step on certain non-porous structural elements — steel beams, concrete foundations, some fiberglass surfaces — after mold has been physically removed, the area HEPA vacuumed, antimicrobial treatment applied, and the structure dried to baseline moisture levels. Applied as a protective finishing coat after proper remediation, it’s a reasonable part of a complete protocol.
What happens in the field is different. Contractors apply encapsulant to drywall that’s actively colonized, to wood framing with deep hyphal penetration, to ceiling tiles saturated with Stachybotrys growth. They skip removal — which is labor-intensive, requires containment, HEPA filtration, and proper disposal — and go straight to coating. The time savings are enormous. The margin improvement is substantial. And the homeowner, no mycology degree in hand, cannot tell the difference until the mold grows through the coating months later. By then, the contractor is unreachable or has a clause in the contract that blames moisture reintroduction.
The markers of encapsulation theater are observable. Before hiring anyone:
The ERMI and HERTSMI-2 testing can establish baseline contamination levels before remediation and post-remediation clearance levels. Any contractor who refuses pre- and post-remediation testing, or who insists on using their own in-house inspector for clearance, is preventing accountability. The mold industry has weak licensing requirements in many states and no universal enforced standard. The homeowner’s protection is knowledge of what legitimate work looks like, independent testing, and a scope of work detailed enough to hold the contractor to.
If mold has spread through a home’s hidden spaces, or a bathroom mold problem keeps returning after treatment, understanding this distinction is the difference between spending money on a solution and spending money to stay sick.
The Mistakes: Why Mold Keeps Coming Back Even After Real Remediation
Mistake 1: Scoping from visible mold instead of moisture mapping.
Visible mold is the small fraction of the problem. In a water-damaged building, mold grows wherever moisture goes — and moisture travels through wall cavities, into insulation bays, under floors, above ceilings, into HVAC systems. A contractor who sets the remediation scope based on visible mold without destructive investigation — opening walls, pulling flooring, accessing ceiling cavities, moisture-mapping with a meter and borescope — is almost certainly underscoping. The result is a remediation job that removes the visible colonies while leaving colonized materials behind closed walls. Those materials continue producing mycotoxins and continue causing health damage to occupants who have been told the problem has been solved.
Mistake 2: Remediating the mold without fixing the water.
This is the single most common reason mold returns after legitimate remediation. The contractor removed the visible colony, replaced the drywall, and left. Three months later, mold is growing on the new drywall because the plumbing leak inside the wall was never found or repaired. Remediation and moisture correction must be completed together and in the right sequence: fix the water first, verify it’s fixed, then remediate. If a remediation proposal doesn’t address moisture source identification and correction — either as included work or as an explicitly required prerequisite handled by another contractor — make certain that work is verified complete before remediation begins.
Mistake 3: Skipping post-remediation structural drying.
Installing new materials into a structure that hasn’t been dried to baseline moisture is a delayed mold problem, not a solved one. New drywall installed over framing at 25% moisture content will have mold growing in the wall cavity within months. Commercial desiccant dehumidification in a significant water-damage scenario takes three to seven days of continuous operation. Skip this step — or use household dehumidifiers instead of commercial equipment — and it’s a corner cut that costs more to fix later than it cost to skip now.
Mistake 4: Ignoring HVAC contamination.
When mold colonizes a building, the HVAC system becomes a distribution network. Spores are drawn into return air, deposited in the air handler and on the coil, and blown throughout the building via supply ducts. Mold in HVAC systems requires its own remediation protocol: cleaning and treatment of the air handler, coil, and drain pan; replacement of all filters; HEPA vacuuming of accessible ductwork. If the HVAC isn’t addressed in the remediation scope, post-remediation air sampling will show positive results regardless of how clean the walls are — because the system is still distributing contaminated air through every room in the building.
Mistake 5: Accepting contractor clearance testing.
A remediation company that clears its own work is not performing clearance testing. It’s performing liability management. Independent industrial hygiene is not optional for any significant mold problem. Budget $500–800 for an independent IH to perform post-clearance air and surface sampling. If clearance fails — and it sometimes does — there’s documentation requiring the contractor to redo work at no additional cost. Without independent clearance testing, there’s no documentation and no recourse. Not a detail to skip to save a few hundred dollars on an $8,000 job.
Mistake 6: Conflating “mold is gone” with “mycotoxins are gone.”
Mycotoxins persist in building materials after mold organisms have been removed or killed. They’re chemically stable, heat-resistant compounds. Some, including certain aflatoxins, require temperatures above 250°C for thermal destruction — impractical in any building. They remain embedded in porous materials, continue off-gassing into the air, and continue producing health effects in occupants who believe the remediation was successful because the mold isn’t visible. Post-remediation ERMI testing provides a measure of mold organism DNA, more reliable than visual inspection. But even a clean ERMI doesn’t guarantee zero mycotoxin load in materials that were not removed. Physical removal is the only intervention that removes mycotoxins from the building environment.
Navigating a flood event and trying to decide what to keep and what to remove — the room-by-room salvage guide gives material-specific guidance for the critical first 72 hours, before mold colonization is fully established. For individuals with known mold susceptibility — HLA-DR variants or an existing CIRS diagnosis — the genetic factors affecting mycotoxin clearance mean the remediation standard is stricter than average. Not “below the level where a healthy immune system can manage it” but genuinely near-zero colonization throughout the building.
The VCS test provides a neurological screen that can indicate current biotoxin burden before building test results come in. It won’t locate the mold, but it will say whether the nervous system is under active biotoxin load — useful information when deciding whether to continue living in the building during remediation planning. And the body-level detox protocol for clearing mycotoxins through sweating, binding agents, and nutritional support is effective only after source exposure is eliminated. Running a detox while still living in a contaminated building is bailing water with the hull still open.
Reader Questions About Bleach Lie Encapsulation: Mold, Bleach, and What Actually Works
Does bleach kill mold on drywall?
No. Bleach does not kill mold in drywall. Drywall has a paper facing over a gypsum core — both porous materials that mold hyphae penetrate readily. If mold is visible on a drywall surface, the colony extends through the paper into the gypsum and potentially through to the wall cavity. Bleach applied to the surface destroys the surface pigment, making the mold invisible for one to four weeks while the hyphae embedded in the paper and gypsum remain alive and continue growing. The EPA’s mold remediation guidance explicitly advises against bleach on porous surfaces for this reason. Drywall with mold penetration requires removal — not treatment. Cut out the colonized section, bag it, dispose of it, address the moisture source that caused the colonization, dry the structure, and rebuild with new material.
Does bleach kill black mold specifically?
Bleach does not reliably kill Stachybotrys chartarum — commonly called black mold — in the settings where it typically grows. Stachybotrys is a slow-growing mold requiring very high water activity and colonizing heavily water-damaged cellulosic materials: drywall paper, water-soaked wood, cardboard. It grows deep into these substrates and produces some of the most toxic mycotoxins of any common indoor mold species, including trichothecenes. Bleach applied to a Stachybotrys-colonized surface decolors the surface while leaving the hyphal network alive in the material. Because Stachybotrys growth typically indicates serious, sustained water damage and deep material colonization, affected materials almost always require complete removal. The black color disappearing after bleach treatment is not evidence the mold is gone. It is evidence the pigment is gone. The mold continues producing trichothecenes in the material below.
What actually kills mold permanently?
No chemical treatment produces permanent mold elimination in porous building materials. The only permanent solution combines three elements: physical removal of colonized materials, correction of the moisture source that enabled colonization, and structural drying to below regrowth thresholds before reconstruction. After physical removal, antimicrobial treatments — hydrogen peroxide-based products at 3–10% concentration, quaternary ammonium compounds, or botanical fungicides — can be appropriate for treating remaining structural surfaces such as wood framing. But these treatments supplement physical removal rather than replace it. “Permanent” is also conditional on ongoing moisture control. Any building material maintained at surface moisture levels supporting growth can be recolonized by ambient spores. Permanent mold elimination requires permanent moisture management and, for mold-susceptible individuals, verified near-zero colonization confirmed by independent ERMI testing.
Is encapsulation ever a legitimate mold remediation technique?
Encapsulation has a legitimate but narrow application: it is appropriate as a final protective coating on non-porous structural elements — steel beams, concrete foundations, some fiberglass surfaces — after mold has been physically removed, the area HEPA vacuumed, antimicrobial treatment applied, and the structure dried to baseline moisture levels. In that sequence, as a finishing coat, encapsulant prevents future surface colonization and is a reasonable part of a complete protocol. What encapsulation is not appropriate for is drywall, insulation, ceiling tiles, wood with deep hyphal penetration, or any porous material that is actively colonized. Applied over live mold on porous materials — which is what most residential contractors mean when they propose it — encapsulation is a cosmetic cover that the mold grows through within months. You pay for a delay, not a solution.
Are mycotoxins destroyed by bleach or other disinfectants?
No. Mycotoxins — the chemical compounds produced by mold that cause human health damage — are not destroyed by bleach at concentrations achievable in residential applications. They are chemically stable, heat-resistant compounds that persist in building materials after the mold organisms that produced them have been killed or removed. Some mycotoxins, including certain aflatoxins, require temperatures above 250°C for thermal destruction. Others are resistant to common oxidizing agents at realistic concentrations. The practical consequence: even if bleach could kill mold in porous materials (it cannot), the mycotoxin load in the material remains intact and continues causing health effects in occupants. Physical removal of contaminated materials is the only intervention that actually removes mycotoxins from the building environment. Post-remediation ERMI testing measures mold DNA and provides a more reliable indicator of remediation adequacy than visual inspection alone.
How do I know if my mold remediation contractor is doing a real job?
Legitimate mold remediation has observable characteristics. Before work begins: containment is established using polyethylene sheeting sealed at all entry points, negative air pressure is created with an HEPA-filtered air scrubber vented to exterior, and workers wear P100 respirators and disposable coveralls. The scope of work explicitly includes physical removal of contaminated drywall, insulation, and porous materials — not painting over them. The contractor asks about and addresses the moisture source. After work: an independent industrial hygienist — not the contractor’s own inspector — performs air and surface sampling before reconstruction begins, with results from an accredited mycological lab. If there is no containment, if materials are being painted rather than removed, if clearance testing is offered as an in-house service, or if the primary product being applied is a “sealant” or “encapsulant,” you are not receiving professional mold remediation. Look for IICRC AMRT or WRT certification and verify the number at the certifying organization’s website.
Can I do mold remediation myself, and what are the actual limits?
DIY mold remediation is feasible for small, clearly bounded problems — a patch of mold on a limited section of bathroom drywall with a known, fixable moisture source — with proper protocol. That means N95 minimum (P100 preferred), gloves, eye protection, polyethylene containment before disturbing anything, cutting out and bagging the contaminated drywall rather than treating it in place, HEPA vacuuming the framing, fixing the moisture source, and allowing complete structural drying before patching. It does not mean spraying bleach on anything. The constraint on DIY is scope and complexity, not cost savings: large contaminated areas (EPA guidance suggests professional help above 10 square feet as a starting point), unknown extents, HVAC involvement, mold-sensitive individuals in the household, or any building history of sustained water damage all argue strongly for professional remediation with independent clearance testing. The biological standard is identical whether you are the homeowner or a contractor — colonized porous material comes out.
The bleach myth survives because it produces a visible result on a short timeline and costs almost nothing. The encapsulation scam survives because most homeowners have no framework for what legitimate remediation looks like — and because the mold industry has minimal licensing requirements and strong financial incentives to sell fast, cheap interventions over slow, expensive ones that actually work.
The information isn’t complicated. The EPA has documented why bleach fails on porous surfaces. The research on mycotoxin persistence after surface treatment is unambiguous. The IICRC S520 standard for legitimate remediation is published and publicly available. What’s missing for most people is access to that information before they spend money on the wrong solution — before the second contractor has already been paid and the mold is already growing through the primer.
If a home has mold, the path is straightforward even when it’s expensive: find the water and fix it, remove the colonized materials, dry the structure to baseline moisture, verify with independent testing, then rebuild. If a body has been exposed, the recovery roadmap is the next step. Need to establish whether the building is the source of the symptoms before anyone will take it seriously? The testing guide gives the tools to build that case with data.
The mold does not care what got spent or what the contractor promised. It will keep growing until the water goes or the material goes. Everything else is theater.
References
Editorial StandardsCorrectionsMedical DisclaimerAbout Our ContentAffiliate DisclosureSite Map